While screws are perhaps one of the most easy to remove fasteners around, even they can become difficult and problematic over time. Removing stubborn screws can be so difficult that it is entirely common to hear screams of frustration when a person is faced with this situation. That being said, removing stubborn screws doesn't need to be as difficult as some people make it out to be. Just follow these instructions, and you will have that screw removed in almost no time at all.
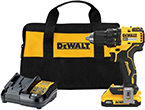
- Get the tools. As with any type of job, removing stubborn screws will require that you use the proper tools. In this particular case this means that you will need to get either a vise gripped wrench or a t-handle, a power drill with the bits, hammer, and screw extractor. All of these tools can be purchased at your local home improvement center if you don't already have them.
- Drill a guide hole. Compare the various drill bits that you have to the screw (not the head, but the screw) and choose one that is a little smaller than the screw, and that it matches the size of the screw extractor. Insert the bit into the drill, and begin drilling a guide hole for the screw extractor. Be careful that you don't go too far, on the average only 1/4 inch deep is the deepest that you need to go.
- Insert the extractor. Place the screw extractor into the hole, and check to make sure that it fits snuggly. If it doesn't, you will need to either select a different extractor, or create a slightly larger hole.
- Get a grip. When you have matched up the drill hole with the proper screw extractor, you will need to get a grip on the situation. The best way to do this is by using either a T-handle or a vice grip wrench. These tools will allow you to get a good solid hold on the extractor, and allow you to turn it like it needs to be.
- Start twisting. With the handle now ready for you to turn, begin twisting and turning the screw extractor counter-clockwise. As you are doing this you need to also push down as much as you can to apply pressure to the screw to help loosen it up as you are turning.
Don't worry if you still weren't able to initially remove the screw. All you need to do is repeat steps two through five that are listed above. This time you will want to create a slightly larger guide hole, and use the next largest size of screw extractors. Remember that even though this is a relatively quick process, you really don't want to rush it. If you do you can end up causing more damage than you would have otherwise.
Author Bio
Lee Wyatt
Contributor of numerous Tips.Net articles, Lee Wyatt is quickly becoming a regular "Jack of all trades." He is currently an independent contractor specializing in writing and editing. Contact him today for all of your writing and editing needs! Click here to contact. Learn more about Lee...
Fixing Small Dents
If you have a small dent, or even a lot of dents, on your car then you know how unsightly and unattractive they are. ...
Discover More
Greenhouse Gardening
Greenhouse gardening can be a great method for producing plants and flowers year round. However, what do you need to ...
Discover More
Planning a Traditional Seder
One of the most important parts of properly celebrating the Passover holiday is holding a Seder. The Seder is the feast ...
Discover More
More Home Improvement Tips
Essential Woodworking Tools
Woodworking can be a great pastime, a fun hobby, or even an enjoyable home project if you are properly prepared. To be ...
Discover More
Cabinet and Countertop Toolkit
One of the most common areas to work on in the home is going to be the cabinets and countertops that you have. After all, ...
Discover More
A Real Workhorse of a Garden Hedge Trimmer
When it comes time to begin trimming, cutting back, or otherwise pruning your bushes and hedges, then a garden hedge ...
Discover More

Comments