There are times when you need to replace an existing deadbolt. Perhaps you've moved to a new home, and the current deadbolt is a double-keyed cylinder, and you would rather have a single-keyed unit. Whatever your reasons for replacing a deadbolt, replacing one is much easier than installing one on an un-mortised door since the holes have already been drilled. All you really need to complete the project is a screwdriver. Make certain that your new deadbolt is the same size as the old one, and follow these guidelines to replace it:
- Unlock the bolt and open the door. Find the latch plate and the strike plate. The latch plate is on the door, and the strike plate is opposite the latch plate, on the door frame.
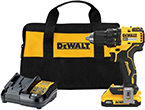
- Remove the screws that hold the latch plate in place. If they are tight, use a power drill to remove them.
- With the edge of the screwdriver, gently pry the latch plate from the door.
- Dismantle the lock assembly by removing the screws holding it together.
- Remove the two pieces of the assembly by pulling them apart. They might be tight, so you may need to jiggle them a bit to loosen them.
- Next, remove the strike plate from the facing door frame by removing the screws that hold it in place, and then pry it from the door frame with the edge of the screwdriver.
- Open your new deadbolt kit and read the directions to familiarize yourself with your project.
- Insert the new assembly into the hole of the door, and screw into place with the screws included in your kit.
- Now install the latch plate and secure it by tightening its screws.
- Before you install and tighten the facing strike plate onto the door frame, align the latch with the strike plate. An easy way to check alignment is to extend the bolt with the door open, apply lipstick to the end of the bolt, close the bolt, shut the door, and extend the bolt. Open the door and you will see the lipstick mark on the door frame where you need to place the strike plate.
- Place the strike plate onto the door frame where you see the lipstick mark, and tighten the screws to secure it.
Test the functionality of your new deadbolt by turning the latch several times, and then going outside and locking and unlocking it with your key.
Author Bio
April Reinhardt
An administrator for a mutual fund management firm, April deals with the written word daily. She loves to write and plans to author a memoir in the near future. April attended Morehead State University to pursue a BA degree in Elementary Education. Learn more about April...
Online Clothing Stores
If you dread the thought of bustling from one store to another, then online shopping is for you. You can shop from the ...
Discover More
Watering Your Lawn
How often you should water your lawn really depends upon many factors such as what type of soil you have, what growing ...
Discover More
Exterior Lighting
The next time you have a summertime backyard party, consider hanging string lighting to enhance the festivities. Exterior ...
Discover More
More Home Improvement Tips
Installing a Deadbolt
While installing a deadbolt lock yourself can be simple, the project does require a few tools and a little know-how. Read ...
Discover More
Installing a Hinged Patio Door
Patio doors are a great way to bring the great outdoors inside your home, and one of the most popular choices are hinged ...
Discover More
Restoring Old Doors
Over time the average home owner will need to replace just about everything in their home. However, instead of replacing ...
Discover More

Comments